Flying Duck's Switch Rehabilitation Clinic

Tech stickies will end up here so as not to clog up the Tech subforum

Moderators: Scott_Anderson, Ted, Flying Duck, Jim

Flying Duck's Switch Rehabilitation Clinic

Postby Flying Duck » Sat Apr 11, 2009 6:13 am

Have your switches lost their spark? Do they not respond to your loving touch as they once used to? Do they feel all sticky and worn out? Have they lost the connection they had when you and your bike began your relationship?

Well, you have two options:

1) Throw away money at your local BMW stealership

or

2) Subject them to Flying Duck's Switch Rehabilitation Clinc where they can be cured by undergoing our simple 12 step program.


Our program:

Step 1) Admit that your switch has a problem.

Step 2) Remove the switch from it's slot. With a little wiggling you can usually pull them out from the front although sometimes they need to be pushed out form the back. When you see the pictures below you'll get an idea of the prongs on the top and bottom that hold them in.

Step 2) Disconnect the switch from the wiring harness. I usually do the rehab in situ on the bike but there are tiny bits to lose so I'd recommend doing this on a workbench your first time out.

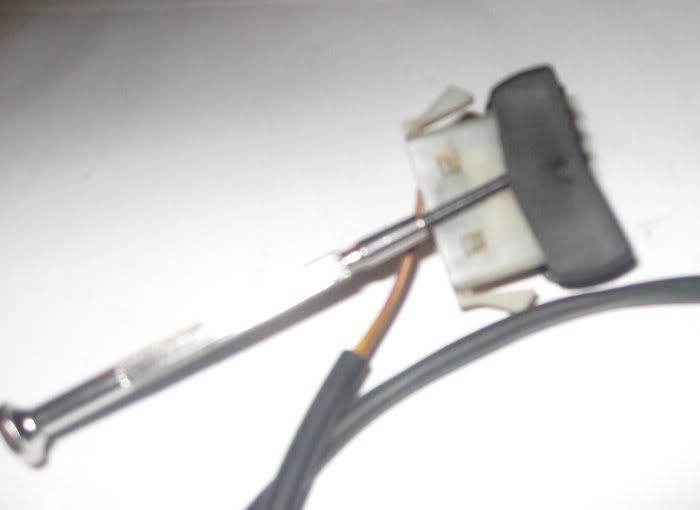
Step 3) Using a small screwdriver on each side pry the top part of the switch off. It pivots on a couple of nylon nipples. You need to pop both sides at once which is why you need two screwdrivers.
Image

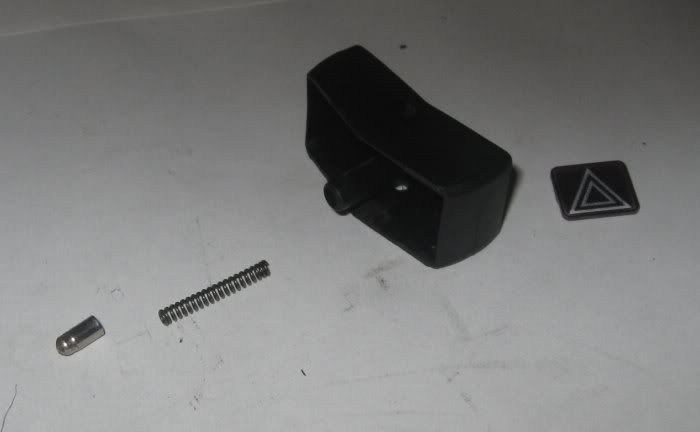
This is the step where you can lose tiny bits. In the rocker is a little tube holding a spring and a little part at the end which, when translated into English by German enginners, is called the little hollow phallus.
Image

(Optional) If the graphic insert on the swtich is worn (because you're a wimp and use your heated grips all of the time) you can push it out from the inside. A replacement can be had from BMW for about $4-5. They just pop right back in and make the switch look brand new again.

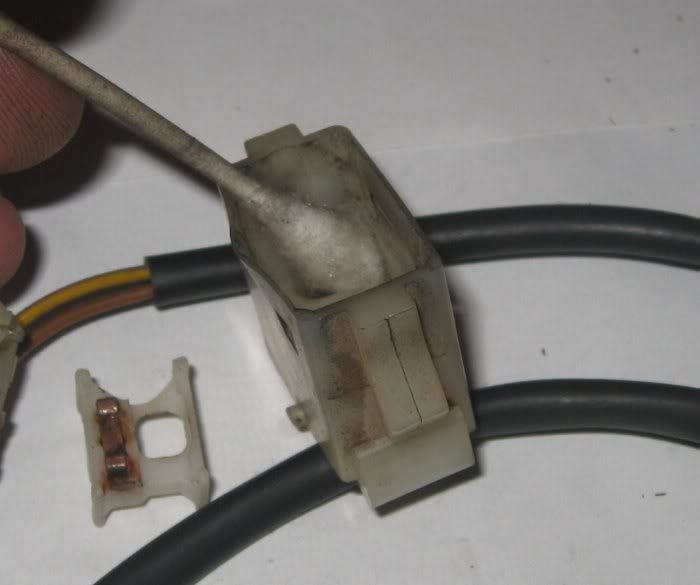
Step 4) From the side pry the back off of the switch. For some reason it seems to go easier if you do it on the side with the wire termnials. Now you see the little slider inside and understand how the switch works.

Step 5) Clean the contacts on the slider and the back of the switch. I usually just scrape them with one of my little screwdrivers until I see shiny copper.

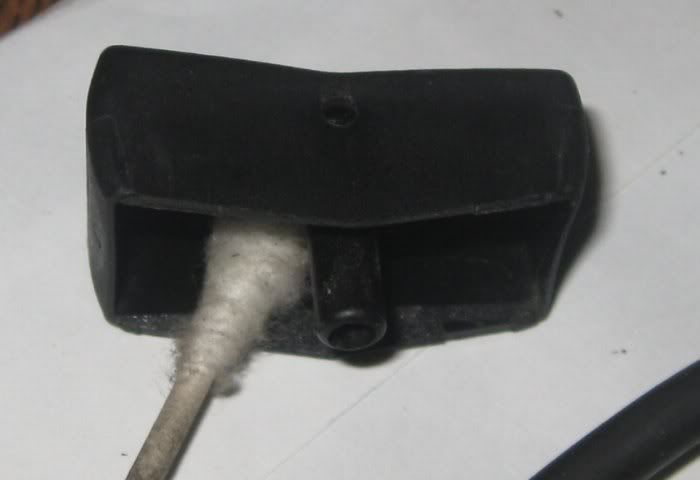
Step 6) Clean/lubricate the switch. Soak a Q-tiip in WD-40. Clean out the inside of the switch where the slider goes and the sides of the slider.
Image

Also do the upper outside of the switch body and the inside of the rocker.
Image

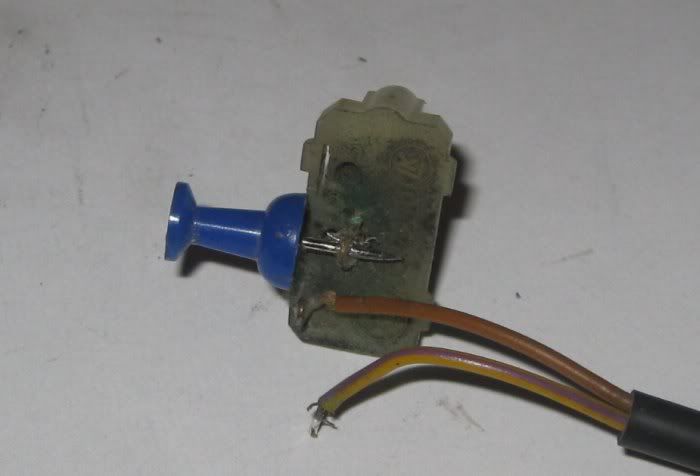
Step 7) Check the wiriing. If a few strands of the wire have broken or it's broken altogether then it's time to get the soldering iron out.

Step 8) Melt the solder on the terminal and remove the old wire. When you melt the solder clean out the hole it in with a tack or needle to make room for the wire to pass through.
Image

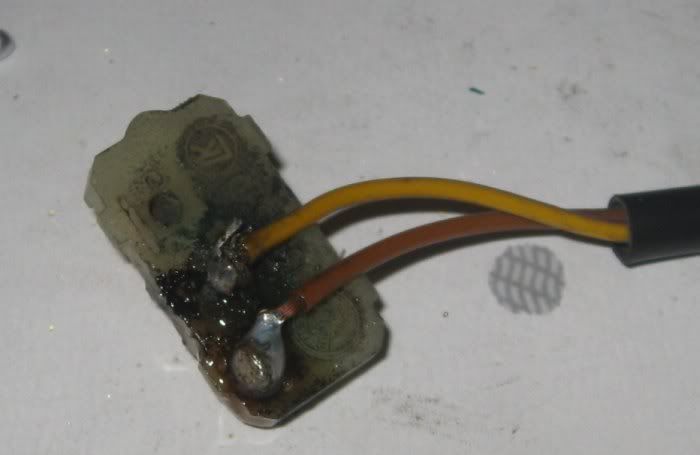
Step 9) Cut the old end of thewire off and strip about 1/4 inch. Then put it through the hole and resolder it.
Image

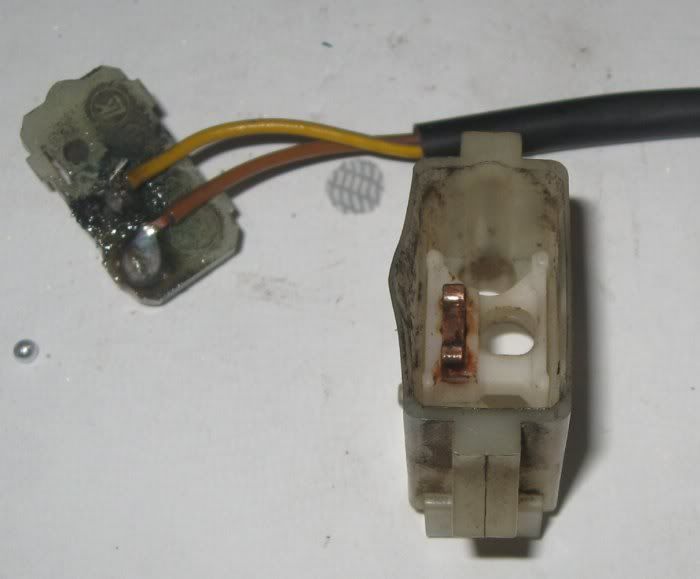
Step 10) Put the slider in and snap the back on.
Image

Step 11) Put the rocker back on. Before you do this use a pen or something to get the slider in a halfway position. Put the rocker on it's back (otherwise the little hollow phallus will escape) and push the switch straight into it.

Step 12) Reinstall the switch.

Repeat after me: I'm good enough, I connect well and doggonit, my owner likes me.

Image
Last edited by Flying Duck on Wed May 20, 2009 2:24 pm, edited 1 time in total.
Image
93 K11LT-"The Alien"
94 K11RS- "Kato"
IBA #17739 (SS1K, BBG, 50CC)
Buy parts HERE
User avatar
Flying Duck
Psychotic Waterfowl
 
Posts: 7402
Joined: Thu Jan 27, 2005 2:41 pm
Location: Seattle, WA

Postby max » Sat Apr 11, 2009 7:13 am

Can i add my 2c?

Best investment before blaming the switches too much might be a cheap digital multimeter (assuming you don't already have one!) There are enough anecdotes of bad connectors already, I guess that's only going to get worse as these bikes age more, and going through all your (very valid!) procedures for a dead connection somewhere back down the line will put a crimp in your day...

Max

PS - other good trick - do the disassembly steps in a clear plastic bag so no nasty spring-loaded doohickeys can ping away to freedom...
max
Flying Brick Rider
 
Posts: 288
Joined: Mon Aug 22, 2005 6:38 am
Location: NZ

Postby Tim (Midland Section) » Sat Apr 11, 2009 4:06 pm

And my 2d (old English). I did this to mine some months ago. The switch in question was well corroded. I nearly wrecked it by melting, as the terminal refused to take solder properly. Keep the iron time on the connection to a minimum.
Regards Tim,

Grey haired riders don't get that way by pure luck
1998 K1100LTSE only 63k miles ATM
750 Commando
BSA B40
G6HRN
#485
User avatar
Tim (Midland Section)
Flying Brick Rider
 
Posts: 597
Joined: Fri Apr 08, 2005 7:57 pm
Location: Cotgrave, Nottingham, England.

Postby Flying Duck » Sat Apr 11, 2009 4:23 pm

Tim (Midland Section) wrote:And my 2d (old English). I did this to mine some months ago. The switch in question was well corroded. I nearly wrecked it by melting, as the terminal refused to take solder properly. Keep the iron time on the connection to a minimum.


I've done a bunch of these and never melted one. It takes squite a bit of heat to melt that nylon. What really helps is if you put some flux on before soldering. Even though a lot of solder claims to be pre-fluxed it works much better if you pre-flux the wires and terminals before soldering.
Last edited by Flying Duck on Tue May 19, 2009 3:22 pm, edited 1 time in total.
Image
93 K11LT-"The Alien"
94 K11RS- "Kato"
IBA #17739 (SS1K, BBG, 50CC)
Buy parts HERE
User avatar
Flying Duck
Psychotic Waterfowl
 
Posts: 7402
Joined: Thu Jan 27, 2005 2:41 pm
Location: Seattle, WA

Postby endoman100 » Sat Apr 11, 2009 4:47 pm

Thanx Much appreciated
will do mine soon.
while doing the fork seals grip heater button lost it's little plastic thing. got wedged between the tank and bars .glad to know i can get another one for 5 bucks.
In the words of the stones
Time Is On My Side
Yes It Is
1993 K1100RS
Image
User avatar
endoman100
Flying Brick Rider
 
Posts: 332
Joined: Mon Jan 26, 2009 6:34 pm
Location: Hastings Fl.

Postby hirschhs » Tue Apr 14, 2009 2:30 pm

tried this last year. Melted everything. Will now try again with FD's excellent tutorial :D
Was never much cop at all this stuff (probably don't have the patience) but if anyone wants to know how to / how not to learn a language: I'm your man! 8)
Cheers, Steve H _______________________________________
K-less in Bucks
2001 ST1100A

1994 Yamaha 600 Diversion 'Hers'
2006 Kawasaki Z750s 'Hers'
Image
User avatar
hirschhs
Flying Brick Rider
 
Posts: 341
Joined: Thu Dec 28, 2006 12:58 pm
Location: Bucks, UK


Return to Tech Resources & Stickies

Who is online

Users browsing this forum: No registered users and 3 guests